How to use screen capture? It's easy! Here is a step-by-step tutorial for your reference.
1-1.
Download and install screen capture for Mac, run it on your Mac.
1-2.
Please make sure that the rectangular or ellipse region that you want to capture is visible on your monitor.
1-3.
Select ellipse region to capture by clicking
![]() or by tray icon
or by tray icon
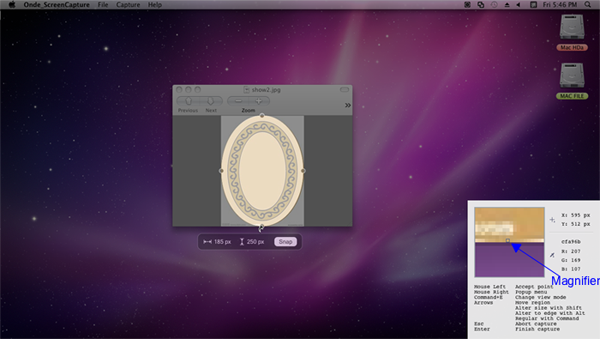
![]() to select it. Move the cursor to a point that approximately the location of the left corner of the region and drag the frame until the knob is at the exact point that you want to use as the right corner of the ellipse region. The knobs on the sides and corners can be used to adjust frame size. Screen magnifier can be used to magnify cursor’s location to help capture accurately.
to select it. Move the cursor to a point that approximately the location of the left corner of the region and drag the frame until the knob is at the exact point that you want to use as the right corner of the ellipse region. The knobs on the sides and corners can be used to adjust frame size. Screen magnifier can be used to magnify cursor’s location to help capture accurately.

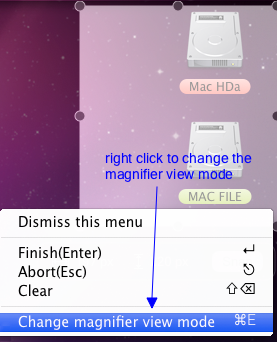
For some other operations, you can either right click the mouse and choose relevant buttons

Or use the following keyboard shortcuts.
Command + E: hide or display supplementary hotkey instructions with screen magnifier.
Arrows: Move frame to up, down, left and right.
Shift + Arrows: Adjust the frame size slightly to up, down, left and right
Alt + Arrows: Move frame sides to the edge of desktop.
Shift+Backspace: Cancel the selection option.
Esc: Exit frame region capturing.
Enter: finish capturing.
1-4.
If the frame size is exactly what you want, then click “Snap” or 'Enter button' to complete capturing.

1-5.
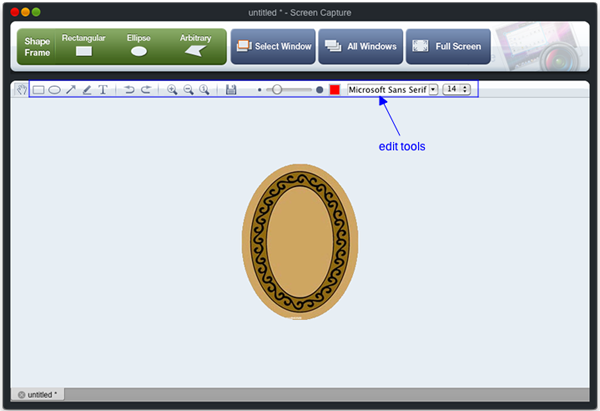
After grabbing images, you can edit with some handy tools like drawing attention with arrows and colorful shapes, adding textual comments and etc. Pencil editor is also supported.
1-6.
Then preview the modified screen shots, you can save it to the
default path
or the output file which you select.
![]() Ondesoft Product
Ondesoft Product
Record any audio on Mac OS
Capture any screenshot on Mac
Unlock DRM protected files on Mac
Mac screen virtual ruler
This is really a good software, very stable and easy to use. I tested many different variants of softwares that can capture screenshots,but they are no unnecessarily complicated.
From Lisa, USA
Copyright © 2025 Ondesoft- http://www.ondesoft.com - All rights reserved